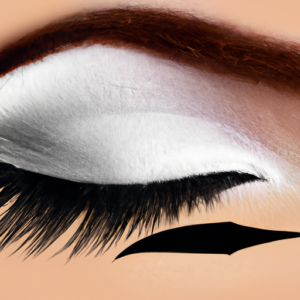
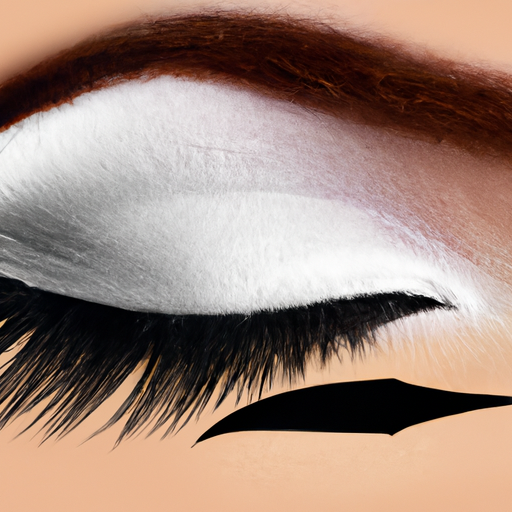
So, you wanna know a thing or two about winging it? Well, for starters, we’re talking about winged eyeliner – the art of using eyeliner to create a sharp, perfect flick on either corner of your eye. This look is all about giving an edgy and intense finish to your makeup routine, and trust me when I say it ain’t easy – mastering this can take some practice, but it’s definitely worth it in the end.
One major benefit of rocking the winged eyeliner look is that it instantly elevates and compliments any eyeshadow look. Whether you want a natural and subtle look, or something more dramatic and bold, winged eyeliner will always be there to help you ace that eye-catching makeup aesthetic.
Getting Your Skin Ready for Winged Eyeliner
It’s all about the prep when it comes to flawless winged eyeliner. If you want your look to last, put in the extra effort before you pull out the liquid liner! Here’s what I like to do to get ready for a wing:
Cleansing: I start by washing my face with warm water and an oil-based cleanser to remove all traces of makeup, oil, and dirt. Then I pat dry and leave my skin to breathe. This helps the eyeliner stay put throughout the night.
Priming: After cleansing, I apply a moisturizer and let it sink in while I do other stuff. Then I add a light layer of primer – this helps the wing stay perfect and prevents smudging as the night goes on. You can use a small, fluffy brush after applying primer to really set it in place.
Choosing the Right Product
Did you know your eyeliner can make or break your winged look? It’s the foundation of any look, and finding the right formula is key! Whether it’s a liquid, gel, or pencil liner, I’m here to walk you through the differences so you can find the perfect fit for you.

For those looking for precision and close control, liquid and gel liners are the way to go. Liquid eyeliners often come in felt tip pens, giving you extra accuracy when drawing your lines. Gel liners have a creamy texture that makes them easier to apply, but they still give you good control over your line. And if you want something that packs a punch, there are smudge-proof, waterproof eyeliners that will stay put all night long.
Pencil liners offer a softer option—they’re great for people who want to draw their wings without too much fuss. But they don’t always last as long, so be sure to stock up on some setting spray and shadow to help set your look.
Whatever you choose, just remember: Have fun with it! Experiment with different formulas until you find one that feels like part of your identity.
Step-by-Step Instructions for Winged Eyeliner
So now you’ve got the basics down, let’s jump in and learn the nitty gritty on how to wing your eyeliner like a pro! Here’s an insider’s guide to getting that perfect flick:
First up, start by applying eyeshadow. A light tone will bring out the color of your eyes, while a darker one can create a smoldering effect around the base of the eye. Don’t be afraid to blend–it’ll make the look more seamless.
Once your eyeshadow is set, it’s time to draw your outer line. Remember, this is what’s going to define the shape of your wings, so take your time! Start with a thin line towards the outer corner, then slowly build up the width and thickness until you reach the desired size. If you’re having trouble, practice with a pen and paper first.
Now that you have your outline, you’re ready to draw the flick. Make sure your pencil has a sharp point before starting, as this will give you more precision and control. Begin by drawing a line along the line you created earlier, then pull it up towards the temple. End the flick at the desired length and thicken it, if needed. Then, fill in the space between the flick and the line to create a full, even shape.
Last but not least, don’t forget to blend! Soft, feathered edges are key here, so use your brush to blur the lines and complete the smooth, blended look. Finish off the look by checking for any mistakes you may have made and correcting them with a cotton swab.
Finishing Touches: Put The Final Flourish On Your Winged Eyeliner
Once you’ve drawn on your winged eyeliner it’s time to put the finishing flourishes on your masterpiece. First up, blending! With a clean brush or Q-tip, gently blend any harsh lines that are still visible. This can help give your look a more natural finish.
Now it’s time to check for mistakes. Have you been a bit heavy handed with your eyeliner? Are the wings too long or lopsided? Take one step back and use a mirror to make sure you’re looking your best before stepping out.
If you find something off, don’t panic. Just grab a cotton swab and some micellar water and correct accordingly. If you’re not happy with the whole thing, ditch it and start all over again – practice makes perfect, after all.
If you need a little extra pizzazz, add some false lashes or tight-line your lashes with an eyeliner pencil. Whatever you do, just make sure to keep it subtle. You don’t want your wings to be the star of the show.
Concluding Thoughts on Winged Eyeliner
Man, what a ride it’s been! Hopefully after reading this you feel like an expert on winged eyeliner and feel ready to start trying it out. If you take your time and practice, you’ll soon be able to perfect your own wing. Remember, don’t be too hard on yourself if you make a mistake – so what if you have to wipe away and start again? Keep at it, have patience, and you’ll be rocking that cat eye in no time.
Now go forth and spread your wings! Goodbye for now and have fun experimenting with your makeup looks.
Eyeliner Tutorial FAQ
How to do winged eyeliner step by step?
As a beginner, winged eyeliner can be a daunting prospect, but with a few tips and tricks up your sleeve, you can easily master the look. First, start by lining your eyes with an eyeliner pencil, drawing a thin line from the inner to outer corner of your lash line. Then, take a small brush and dip it into gel or liquid eyeliner to make the line a little thicker. Finally, draw a wing at the end of the line, extending it out slightly past the outer corner of your eye, and connect it to the line on the lower lash line. To make sure it’s even, use your finger or the tip of a Q-tip to create a smooth arch.
For more precise control of your wing, it’s always a good idea to draw out the shape first with a white pencil liner. Once you’re happy with the shape, you can go over it with a black or colored eyeliner to get your desired look. It’s also helpful to use a felt-tip liner for a steady, clean line. Try to keep your hand steady and hold your brush perpendicular to your lid for the best results.
Once you’ve mastered the basic shape, you can go back in and use a small pointed brush to fill in the gaps. If you’re going for a more dramatic look, you can also use a darker shade or glitter liner to add a bit of sparkle and depth to your look. And don’t forget to finish off your look with a coat of mascara to open up your eyes and make them look bigger. With a bit of practice and patience, you’ll be rocking a perfect cat eye in no time!
How to do winged eyeliner for beginners with pencil?
I’ll let you in on a little secret that the pros know – using a pencil eyeliner is the best way for the winged eyeliner beginner to get it right the first time. First, start with an angled brush for an extra precise line. Dip the brush in some gel eyeliner or a matte black eyeshadow. Now, here’s the important part: start at the inner corner of the eye and draw a thin line along the lash line. If you’re feeling a bit shaky, go slowly and make sure you go as close as you can to the lash line. Once you get to the outer corner, turn the brush on a slight angle and keep going towards the end of your brow. You’ll want to end on the outer edge, finish with a nice flick where the lashes end. And voila! You’ve got the perfect winged eyeliner!
How to do winged eyeliner for beginners with liquid?
For beginners looking to master the art of winged eyeliner, I suggest starting with liquid—it’s the easiest way to get the perfect look. To keep it simple, start by drawing a line from the inner corner of your eye out to the outer corner. Then, draw an upward line from the outer corner and extend it out into a wing. You can also mark where you want the wing to end before you draw the line, or press a piece of tape into the intended point and use it as a guideline. To create a sharp line and wing, use a liquid eyeliner with a fine brush, and hold the brush close to the lash line. Make sure to use a continuous, even pressure as you glide along the lash line and go slow as you draw the wing. Once you’ve achieved the desired shape, use a cotton swab or smudge brush to soften any harsh lines. Finish the look with a few coats of mascara, and you’ll have a perfect winged look!
