
Get your lash game on point: tips for amazing mascara application on thin lashes
So, let’s be real. I’ve had thin and barely there lashes for most of my life. I’ve tried every available mascara, and I have learned that there is truly a science to applying mascara that you probably never thought about. The thing is, mascara can turn your look from bland to bold with just a few swipes.
Allow me to share my secrets for achieving perfectly luscious lashes with the precise application of mascara.
1. Introduction
First thing’s first, let’s define what we mean by “thin lashes.” Thin lashes refer to lashes that are shorter or more space apart than the typical lashes. The natural length of lashes vary depending on genetics, but some of us need a little extra help in the lash department, whether that’s from damage or simply having naturally thinner, shorter, or paler lashes.
But let’s talk about the benefits of mascara on thin lashes. The right mascara can totally transform your eyes, giving you an extra pop. It can make your lashes appear fuller, longer, and thicker, and it’s an easy way to elevate a look without any major effort.
The Perfect Mascara for Thin Lashes (and not for others)
Let’s face it, not all mascaras are created equal. If you have thin lashes like me, finding the perfect mascara can be a daunting task. But fear not, after years of trial and error, I have found the perfect mascara for thin lashes. And no, this mascara is not for everyone, but it sure does work wonders for those of us with sparse and short lashes.
Before diving into the best mascara for thin lashes, it’s important to note that there are different types of mascaras: volumizing, lengthening, and curling. For thin lashes, the best mascaras are lengthening and defining. These mascaras will help elongate and separate each lash, giving the illusion of fuller lashes.
The key to finding the perfect mascara for thin lashes is in the formula. Look for a mascara that is lightweight and buildable. Thick and heavy formulas will weigh down your lashes, resulting in clumping and drooping. A lightweight formula will allow you to layer the mascara and build up the volume without weighing down your lashes.
Before applying your chosen mascara, it’s important to prep your lashes. Use an eyelash curler to gently curl your lashes upward. This will help lift your lashes and create a wider, more open-eyed look. Applying a lash primer before your mascara will also help to add volume and length to your lashes.
When it comes to applying mascara to thin lashes, technique is key. Start at the base of your lashes and wiggle the wand back and forth to deposit the mascara. Then, move the wand in a “Z” shape, wiggling it upward as you go. This technique will help to evenly coat each lash and add length. Once you’ve applied the mascara, comb through your lashes with the wand to separate any clumps.
For a more dramatic look, add a second coat of mascara. When applying the second coat, focus on the tips of your lashes to add length and definition. Finally, use a lash comb to separate and define your lashes, creating a more polished look.
So there you have it, the perfect mascara for thin lashes is all about the formula and technique. With the right product and application, you can achieve beautifully long and defined lashes. Say goodbye to spidery lashes and hello to perfectly defined eyes!
Getting my lashes ready:
Before applying mascara, I always make sure I prepare my lashes to get the best results. Here are the steps I follow:
Curling my lashes
I use an eyelash curler before applying mascara. Curling the lashes gives them a lift and creates an illusion of length. I hold the curler at the base of my lashes and gently clamp down for a few seconds. I repeat this process two to three times.
Applying a primer
I also like to use a lash primer before applying mascara. This adds extra volume and length to my lashes. The primer also helps the mascara to adhere better to my lashes and lasts longer. I apply the primer from the base of my lashes to the tips.
By curling my lashes and using a lash primer, my lashes are prepped and ready for the mascara application. These two simple steps make a huge difference in the final look.
The Ultimate Guide to Applying Mascara on Thin Lashes
Alright, let’s get into the nitty-gritty of the mascara application process for thin lashes. This is where the magic happens! In this section, I’ll walk you through the expert tips and tricks I use to create stunning, defined lashes that will turn heads.
Step 1: Wiggling the Wand at the Base
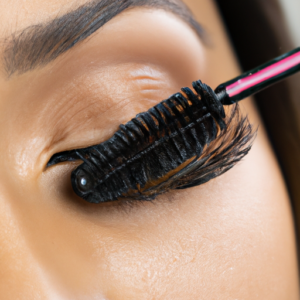
First things first, grab your mascara wand and wiggle it gently at the base of your lashes. Make sure to get as close to the roots as possible. This step helps lift and separate your lashes. Then, gently swipe the wand upwards towards the tips of your lashes.
Step 2: Moving the Wand in a “Z” Shape
Now that you’ve coated the base of your lashes, it’s time to create more length and definition. Using the wand, move it in a “Z” shape from the base to the tip of your lashes. This will help coat each lash hair individually, giving you a fuller, more defined look.
Step 3: Comb Through the Lashes with the Wand
After you’ve applied the mascara in a “Z” shape, use the wand to comb through your lashes gently. This helps remove any clumps and separates your lashes further. Make sure to comb through from the base to the tips of your lashes for the best results.
Step 4: Adding a Second Coat of Mascara
If you want to go for a bolder look, you can definitely add a second coat of mascara. Simply repeat steps one through three for your second coat.
Step 5: Separating and Defining Lashes with a Lash Comb
For the finishing touches, use a lash comb to separate and define your lashes further. This helps to remove any clumps and ensures every lash is coated with mascara.
And voila! You now have perfectly defined lashes that will turn heads. Remember to choose the right type of mascara and formula for your lashes, curl your lashes beforehand, and practice the tips I’ve mentioned above for best results. Happy Mascara-ing!
Want to learn more about how to make your thin lashes look fuller? Check out this fantastic resource from Eyelashesholic for even more expert advice.
Finishing Touches: Time to Perfect Your Lashes!
Now that we’ve applied our first coat of mascara and built our lashes up, it’s time to add the finishing touches for maximum definition. Here are some suggestions:
Adding a Second Coat of Mascara
If you’re looking for Hollywood-worthy lashes, applying a second coat of mascara can make all the difference. Once your mascara has fully dried, sweep on a second coat to boost volume and length. Don’t forget to apply the second coat with the same care and precision as the first to avoid clumps.
Separating and Defining Lashes with a Lash Comb
If you accidentally got some clumps or globs, don’t worry, you can always fix it. Before the mascara is completely dry, use a metal or plastic lash comb (choose which one you prefer) to separate your lashes and remove any clumps or get rid of the “spider legs.” Tilt your head back, look down and slowly comb through your lashes from the base to the tips. Voila! Precise and separated lashes.
Maintaining Your Lash Look
To keep your lashes looking their best all day, avoid rubbing your eyes or tugging at your lashes. Opt for a waterproof or long-wear mascara that won’t smudge or smear easily. If you want to extend the life of your mascara, you can seal it with a protective topcoat, such as a clear mascara or a lash sealer.
With these finishing touches, you’ll take your lashes to the next level. Say goodbye to thin and lifeless lashes and hello to a dramatic, show-stopping look!
That’s a wrap, folks
Well, there you have it- the perfect technique for applying mascara to thin lashes! Hopefully, you’re feeling more confident and ready to tackle your lash game with ease.
Throughout this blog post, I’ve given you some valuable tips on how to choose the right mascara, prep your lashes, and apply the product like a pro. Remember to always curl your lashes and apply a primer before your mascara to get the best results.
When applying your mascara, use a “wiggle-ziggle” motion and comb through your lashes with the wand. This will help you get full, defined lashes that will make your eyes pop!
Don’t forget the importance of adding a second coat of mascara and using a lash comb to separate your lashes for that extra oomph.
Now go out and show off your incredible lashes, thanks to your newfound expertise in applying mascara to thin lashes.
Remember, practice makes perfect, so don’t be afraid to experiment with different techniques until you find what works best for you. Good luck and happy mascara-ing!