Get Ready to Bat those Lashes: My Ultimate DIY Lash Serum Recipe
Hey there, gorgeous! Are you looking for a natural, budget-friendly way to enhance your lashes? I’ve got just what you need with my ultimate DIY lash serum recipe. This post will provide you with an easy-to-follow guide on how to create an all-natural lash serum that will give you long, thick, and healthy-looking lashes.
This serum is perfect for those who want to avoid commercial lash growth products, which can be expensive, contain harsh chemicals, and may even cause unwanted side effects. With this DIY serum, you’ll be using natural ingredients that have been proven to stimulate hair growth, such as castor oil and vitamin E oil. Plus, it’s quick and straightforward to make, so you can have longer, fuller lashes in no time.
Why a DIY Lash Serum is Worth Your Time: The Benefits
Okay, let’s be real here. Who doesn’t want long and luscious lashes? The kind that flutter with every blink and make your eyes sparkle. But achieving that can be difficult, especially when our natural lashes just don’t want to cooperate. This is where a lash serum comes in. Not only does it help promote lash growth, but it can also strengthen and nourish your lashes, leading to healthier and fuller-looking lashes in the long run.
But why spend a fortune on store-bought serums when you can make your own at a fraction of the cost? By using a few simple ingredients and following these easy steps, you can have a DIY lash serum that’s just as effective as any high-end product.
Aside from the cost efficiency, there are other benefits to using a DIY lash serum. For starters, you know exactly what’s going into your serum. Commercial products often contain chemicals and preservatives that can irritate the delicate skin around your eyes. With a homemade serum, you can choose natural ingredients that are safe and gentle on your skin.

Furthermore, a DIY lash serum is customizable. Depending on your lash type and needs, you can adjust the recipe to make it more suitable for you. Maybe you want a serum that’s thicker in consistency or one that has a more pleasant scent. Whatever it may be, you have the freedom to tailor your serum to your liking.
Another benefit of using a DIY lash serum is the sense of accomplishment that comes with making something yourself. There’s no denying the satisfaction that comes with creating a product that works and saves you money at the same time. Plus, it’s always nice to have a little DIY project to work on!
Ingredients Needed for DIY Lash Serum : The Good Stuff!
Hey y’all, I’m excited to share with you the ingredients you’ll need to create your own amazing DIY lash serum! This serum is going to give you longer, fuller, and healthier lashes in no time. Let’s get started!
Castor Oil
Castor oil is one of the essential ingredients in our lash serum. It is rich in fatty acids and vitamin E, which moisturizes your lashes, promotes growth, and prevents breakage. You can find it at any local pharmacy or online.
Vitamin E Oil
Vitamin E oil is an incredible all-natural ingredient that nourishes, strengthens, and adds elasticity to your lashes. It also maintains the conditions for lash growth. You can purchase this oil at a beauty store or online.
Sweet Almond Oil
Sweet almond oil contains vitamin E, magnesium, and fatty acids, which moisturize your lashes, nourish the hair follicles, and promote lash growth. This is another all-natural ingredient you can find at a health store or online.
Cedarwood Essential Oil
Cedarwood essential oil is one of the secret weapons in our lash serum. It has antifungal and antibacterial properties, which cleanses your lash line, promotes healthy growth, and thickens your lashes. You can purchase this oil online or at specialty stores.
Aloe Vera Gel
Aloe vera gel is a great ingredient to soothe and nourish your lashes. It contains vitamins, enzymes, and amino acids, which promote lash growth and prevent dryness. You can purchase this gel at any health store or online.
Now that you have all the ingredients, it’s time to put them together! Check out this amazing link here, which will guide you through the step-by-step process of making your own DIY lash serum.
Follow These Steps to Make Your Own DIY Lash Serum
Are you tired of spending a fortune on lash serums that claim to give you longer, fuller lashes? Look no further! Follow these easy steps to make your own DIY lash serum at home.
Step 1: Gather Your Ingredients
Start by gathering all the ingredients you will need for your DIY lash serum. These typically include castor oil, vitamin E oil, and essential oils like lavender or rosemary oil. Make sure to use high-quality, 100% pure oils to ensure the best results. You can easily find these ingredients at your local health food store or online.
Step 2: Mix the Ingredients
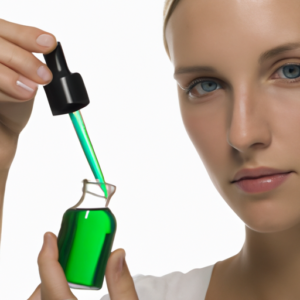
Use a small bowl or glass dropper bottle to mix your ingredients together. I usually do a 3:1 ratio of castor oil to vitamin E oil and then add a few drops of essential oil for fragrance. Stir everything together until fully blended.
Step 3: Apply to Lashes
Now, it’s time to apply the serum to your lashes! I use a clean mascara wand to apply the serum to my lashes, starting from the base and working my way up to the tips. Be careful not to get any serum in your eyes, and if you do, rinse with water immediately.
Step 4: Use Daily for Best Results
For best results, use your DIY lash serum every night before bed. Make sure to be consistent and patient – it takes a few weeks to start seeing results, but trust me, it’s worth it!
Step 5: Store in a Cool, Dry Place
Store your DIY lash serum in a cool, dry place, away from direct sunlight. It should last for several months if stored properly.
There you have it – a simple, easy-to-follow guide for making your own lash serum at home. Give it a try and let me know how it worked for you!
5. Tips ‘n’ Tricks for Best Results: My personal advice for DIY lash serum
Hey, beautiful people! As someone who’s been making and using lash serums for a while now, I’ve learned some neat tricks and hacks to get the best results out of ’em. Here are my top tips:
1. Be consistent and patient:
Just like any skincare routine, you need to be consistent with your lash serum to see visible changes. Use it every night (or as directed) for at least a month to notice a difference. Trust me, the results are worth the wait.
2. Cleanse your lashes:
This one’s a no-brainer. Before you apply your lash serum, make sure your lashes are clean and free from makeup and oils. Use a lash cleanser or a micellar water to gently remove any residue.
3. Use enough serum:
A common mistake people make is not using enough serum. You don’t need a lot, but make sure you apply enough to cover your lashes from root to tip. Think of it as nourishing your lashes from the inside out.
4. Apply serum at the base of your lashes:
When applying your serum, focus on the base of your lashes where the hair follicles are. This is where the serum will be most effective in promoting lash growth.
5. Use a spoolie to distribute the serum:
A spoolie (or a clean mascara wand) is your best friend when it comes to applying lash serum. After applying the serum to the base of your lashes, use the spoolie to comb through your lashes and distribute the serum evenly.
6. Avoid rubbing your eyes:
This one’s a given, but it’s worth mentioning. Avoid rubbing your eyes, as this can cause damage to your lash follicles and result in lash loss. Be gentle with your eyes and your lashes will thank you.
7. Keep track of your progress:
Lastly, it’s a good idea to keep track of your lash progress. Take before and after photos to see the difference in length and thickness. It’s a great motivator to keep using your DIY lash serum and achieve your lash goals!
Wrapping Up
Alright, that’s it! I hope you found this DIY lash serum blog post useful and informative. As you can see, making your own lash serum is not only cost-effective but also fun and easy. However, don’t forget to be precautions when applying the serum to your eyes and wait patiently for the results to show. Overall, using a lash serum can definitely help improve the condition of your lashes, making them longer, thicker, and healthier-looking. But remember, everyone’s hair is unique, and it may take a few weeks to notice results. Don’t give up yet – consistency is key! Lastly, make sure to store your DIY lash serum properly in a cool and dry place, and avoid introducing bacteria or microbes. I hope you found our tips and tricks helpful, and feel free to let us know in the comment section if you have any questions or suggestions. Best of luck with your lash journey!
