Kim Kardashian’s Beauty Influence and the Importance of Eyelash Curlers
Hey there, beauty lovers! Today, I want to talk about something that’s been on my mind lately: the impact of Kim Kardashian on beauty trends. Whether you love her, hate her, or feel indifferent, there’s no denying that she’s had an enormous influence on the way many of us approach makeup and skincare.
One element of Kim K’s signature look that I find particularly intriguing is her eyelashes. They always look so long, thick, and curled! As someone with naturally straight lashes, I’ve always been a bit envious of her look. That’s why I decided to do some research on what eyelash curler she uses and how she gets those luscious lashes.
But before we dive into that, let’s talk a bit about why eyelash curlers are so important in the first place. As someone who’s been using them for years, I can tell you that they’re an absolute game-changer! They help to lift and curl your lashes, making your eyes look larger and more awake. They also make mascara application easier and prevent your lashes from poking you in the eye (ouch). Basically, if you love the look of long, fluttery lashes, you need an eyelash curler in your life.
If you’re curious to know what eyelash curler Kim Kardashian uses, I highly recommend checking out this article. It provides a deep dive into the product she swears by, along with some alternative options. Of course, it’s totally up to you whether you want to try the same one or not. Everyone’s lashes are unique, so what works for one person might not work for another.
Feast Your Eyes on Kim K’s Favorite Eyelash Curler
I’m beyond excited to share with you Kim Kardashian’s go-to eyelash curler! As a beauty enthusiast, I understand the importance of having the right tools to achieve that desired look. That’s why I’m here to share with you the product that Kim K swears by for getting her lashes on fleek.

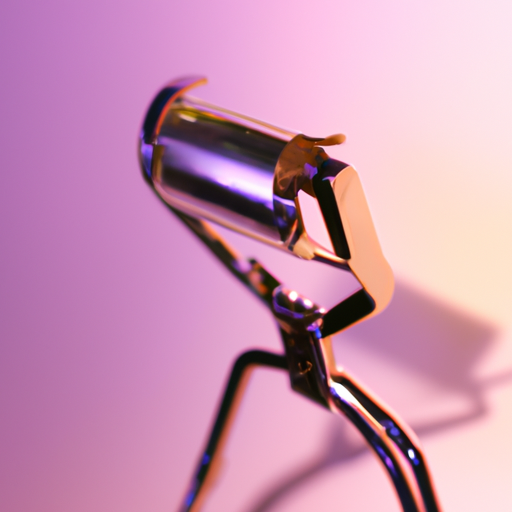
The Shu Uemura eyelash curler is Kim Kardashian’s go-to and for a good reason. It’s designed to fit all eye shapes and has a unique hinge that allows for consistent pressure on the lashes, resulting in a perfect curl every time. The curler also comes with a replacement silicone pad, making it easy to maintain and prolonging the life of the product.
Benefits of this Particular Eyelash Curler
One of the biggest advantages of the Shu Uemura eyelash curler is its patented hinge, which ensures a gentle and even curl without pulling or tugging on the lashes. Additionally, the shape and curvature of the curler are perfect for most eye shapes. Finally, the longevity of the product is great for anyone on a budget, as it requires minimal replacements over time.
How to Use an Eyelash Curler to Get Kim K’s Look
Using an eyelash curler can be daunting, especially for first-time users. However, I’m here to help you achieve that Kim K look with just a few steps. First, start with a clean and dry eyelash. Place the curler as close to the lash line as possible and gently clamp down for a few seconds. Release the clamp and move to the middle and then the tip of the lash for additional curls. Voila!
Tips for Getting the Most Out of Your Eyelash Curler
Maintaining and cleaning your eyelash curler is crucial if you want it to work effectively. A simple wipe down with a damp cloth can remove any leftover mascara or dirt. In addition, heating up the curler with a blow dryer for a few seconds before curling can help create a long-lasting curl. Finally, make sure to replace the pads regularly to avoid any discomfort or pinching of the eyelids.
In Conclusion
Eyelash curlers can be intimidating, but with the right product and technique, you too can achieve that Kim K look. The Shu Uemura eyelash curler is the perfect tool for anyone looking to enhance their natural lashes. Give it a try, and you won’t be disappointed.
Don’t wait! Get your hands on Kim K’s favorite eyelash curler and elevate your beauty look in no time.
Get Kim K’s Look with an Eyelash Curler – Let Me Show You How!
Hey there! So, you want to know how to get those perfect, curled lashes that Kim Kardashian is known for? Well, you’ve come to the right place! Using an eyelash curler can make a HUGE difference in the appearance of your eyes, and it’s really not that complicated. Here’s how I do it:
Step 1: Start with Clean, Dry Lashes
Before you use an eyelash curler, make sure your lashes are completely clean and dry. Any leftover mascara or oil can make it really hard to get a good curl. You can use a lash comb or spoolie brush to help separate your lashes beforehand, too.
Step 2: Warm Up Your Eyelash Curler
Okay, this might sound a little weird, but it really works. Use your blow dryer to warm up your eyelash curler for a few seconds. (Don’t make it too hot, though! You don’t want to burn your eyelids). Warming up the curler helps to set the shape of your lashes better than using it at room temperature.
Step 3: Position the Curler at the Base of Your Lashes
Open the curler and place it at the base of your upper lashes. Make sure the curler is positioned correctly – you want it to be as close to your lash line as possible, but without pinching your skin.
Step 4: Gently Squeeze and Hold
Now, gently squeeze the curler closed and hold it for about 10 seconds. You want to apply enough pressure to curl your lashes, but not so much that you feel any pinching or discomfort.
Step 5: Release and Repeat
Release the curler and move it up a bit, curling your lashes in sections until you reach the tips of your lashes. Don’t rush – take your time to make sure you get each section of lashes curled just right. And be careful not to overdo it! Over-curling can lead to lashes that look unnatural or break easily.
Step 6: Apply Mascara and Admire Your Work!
After you’ve curled your lashes, apply your favorite mascara and you’re all set! Congratulations – you’ve just achieved the Kim K eyelash look. Practice makes perfect, so feel free to experiment with different techniques and tools until you find what works best for you.
Tips to Get the Most Out of Your Eyelash Curler
Hey there! As a makeup enthusiast, I know the importance of a good eyelash curler. It can make or break your look, and nobody wants droopy lashes! That’s why I want to share some tips that will help you get the most out of your eyelash curler.
Keep Your Curler Clean
One of the most important things you can do for your eyelashes and your curler is to keep it clean. Makeup and oils from your lashes can build up on the curler, making it less effective. So, make sure you clean it regularly with a cotton swab dipped in rubbing alcohol. Not only will it be more hygienic, but your curler will also last longer.
Heat It Up
Ever heard of heating up your eyelash curler? It’s a game-changer! By heating up your curler with a hairdryer for a few seconds, you make it easier to curl your lashes. Be careful not to overheat your curler, or you could burn yourself. The ideal temperature is just warm enough to touch.
Position Your Curler Correctly
When you’re using an eyelash curler, you want to make sure you’re positioning it correctly. Start by placing the curler at the base of your lashes and gently clamp down. Hold it for a few seconds, then release, and move the curler up your lashes in small increments until you reach the tips. That way, you’ll get a natural, long-lasting curl.
Curl Before Mascara
I know it’s tempting to curl your lashes after applying mascara, but it’s a big no-no. Curling your lashes after applying mascara can cause your lashes to stick to the curler and even break. Plus, it could pull the mascara off and ruin your look. That’s why it’s best to curl your lashes before applying mascara.
Experiment with Curlers
Not all curlers are created equal, so it’s worth experimenting until you find the perfect one for you. Look for one that fits the shape of your eye and your lashes well. You could also consider getting a heated eyelash curler or a curler with a rounded shape to get a more natural lift. Just find what best fits your needs and stick to it!
There you have it, my top tips for getting the most out of your eyelash curler. Now, go ahead and get curling!
Final Thoughts on Kim Kardashian’s Favorite Eyelash Curler
Well, folks, that’s all she wrote! After diving deep into the world of eyelash curling, I can confidently say that Kim Kardashian’s go-to eyelash curler is the real deal. Its unique shape and design make it easy to use and deliver beautiful, lasting curls.
But before you go out and snag one for yourself, remember that getting the perfect curl takes practice. Be patient and follow our step-by-step guide for best results. And if you’re looking to really up your eyelash curling game, don’t forget to clean and maintain your eyelash curler regularly.
And there you have it, my friends! With a little know-how and practice, you too can achieve Kim K-worthy lashes. So what are you waiting for? Get curling!
