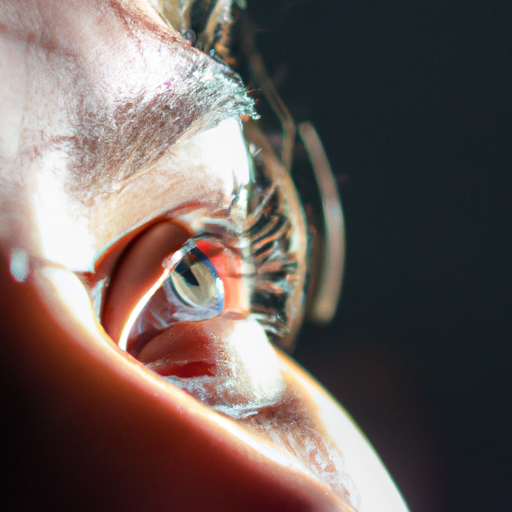
Hey there, mascara lovers! Ready to up your lash game and achieve those stunning, fluttery eyelashes? Well, you’ve come to the right place! Today, I’m going to spill all my top-notch mascara application knowledge, so get ready to conquer those upper lashes like a pro. Say goodbye to clumps and hello to fabulously defined lashes that will make heads turn!
What You Need
Well, before you dive right into the world of killer mascara application, let’s make sure you’ve got all the essentials. Here’s the lineup: an eyelash curler, your trusty mascara, and if you’re feeling fancy, a cotton swab. Now, you might be wondering, “Why do I need all this stuff?” Well, my friend, let me break it down for ya. The eyelash curler is gonna give your lashes that extra oomph and create a canvas for the mascara magic. And the mascara? Well, that’s gonna be the star of the show, making your upper lashes pop like nobody’s business. And don’t forget about the cotton swab – it’s gonna be your secret weapon for nailing that natural look. So, gather up these goodies, and let’s get ready to bat those lashes with confidence!
Step-by-Step Guide to Applying Mascara to Upper Eyelashes
Alright, let’s dive into the nitty-gritty of applying mascara to those upper lashes. Trust me, it’s easier than it seems! Just follow these simple steps:
1. Get those lashes curly!
First things first, grab that trusty eyelash curler and give your lashes a little lift. Gently clamp the curler at the base of your lashes and hold it for a few seconds, then release. Voila! Instantly more lifted and awake-looking lashes.
2. It’s all about that angle.
Now, here’s where the magic happens. Hold your mascara wand at a slight angle and start at the very base of your lashes. With a swift and fluid motion, wiggle that wand from side to side as you move it upwards. This helps to evenly distribute the mascara and avoid clumps.
3. Build it up, baby!
One coat of mascara is good, but two coats can take your lashes to new heights. After the initial application, let it dry for a moment and then go in for round two. Trust me, the added volume and length will be worth it.
4. Too much? No worries!
If you accidentally go a little heavy on the mascara, don’t fret. Grab a clean cotton swab and gently swipe away any excess product from the tips of your lashes. This will help prevent any clumping or overload of mascara.
So, there you have it! A simple step-by-step guide to rocking flawless upper lashes with mascara. Embrace your inner lash queen and get ready to bat those beautiful eyes.
Tips and Tricks for Applying Mascara to Upper Eyelashes
I’ve got some insider secrets and expert tips to help you take your mascara game to the next level. These tricks might sound a little out of the ordinary, but trust me, they work wonders! So grab your mascara wand and get ready to transform your lashes.
Get Waterproof for the Great Outdoors!
Ladies, if you’re planning to conquer the great outdoors or dive into some water fun, waterproof mascara is your best friend. Don’t let a little rain or a pool party ruin your perfectly curled lashes. Opt for a waterproof formula to keep your mascara in place no matter what.
Prime Your Way to Lash Perfection
Let me spill a little secret: using a mascara primer before applying mascara can really amp up your lash game. It’s like giving your lashes a secret weapon. The primer helps to lengthen and add volume, making your mascara look even more fabulous. Trust me, your lashes will thank you for this extra step.
Add a Lash Serum for Va-Va-Voom
If your lashes are a bit on the sparse side, don’t worry, I’ve got your back. Try incorporating a lash serum into your routine. These little magic potions can provide you with the lashes of your dreams – long, full, and beautiful. You’ll be batting those lashes like a pro in no time.
Bye-bye Clumps, Hello Clean Wand!
Clumpy mascara is a big no-no. But fear not, I have a trick that will save you from that unsettling sight. Before applying your mascara, make sure to wipe off any excess product from the wand. This ensures a smooth and clump-free application. Trust me, your lashes will thank you for this little extra step.
So there you have it, my friends! These are my top tips and tricks for applying mascara to your upper lashes. With waterproof formulas, lash primers, lash serums, and clump-free applications, you’ll have the most enviable lashes around. Give these tips a try and watch as your lashes go from “meh” to “wow” in no time!
Conclusion
Well, there you have it, folks! We’ve reached the end of this mascara application journey. I hope you’ve gained some valuable insights and tips on how to achieve those stunning upper lashes. Remember, don’t be afraid to experiment and find what works best for you.
In a world of endless mascara options, I swear by using a waterproof formula for any outdoor shenanigans. You never know when unexpected rain or a dip in the pool might come your way. Trust me, panda eyes are never a good look.
Now, let’s talk about mascara primers – they’re like the secret weapon to achieving the lashes of your dreams. Adding a primer before your mascara not only helps to lengthen and thicken your lashes but also helps your mascara hold throughout the day without smudging or flaking. It’s like giving your lashes a little boost, and who doesn’t want that?
But what if your lashes are on the thinner side? Don’t fret! Give a lash serum a try. These magical potions are designed to nourish and stimulate lash growth, giving you that full and fluttery effect. It’s like a power-up for your lashes, and trust me, you’ll be batting them like a pro in no time.
Clumping is the enemy of stunning lashes, and we all know it. So, here’s a pro tip for you – always make sure to clean off any excess mascara from the wand before applying. This way, you’ll have better control and can avoid those pesky clumps. Your lashes will thank you!
So, remember my friends, mascara application is all about finding what works best for you. Don’t be afraid to try new techniques and products, and always remember to have fun with it. Here’s to long, voluminous upper lashes every single time! Cheers!
6. Using the Eyelash Curler, Gently Curl Your Lashes Before Applying Mascara
Alright ladies, let’s dive into this crucial step! Before you even think about applying mascara, grab that trusty eyelash curler and give your lashes a little TLC. Picture this: you’re at the top of the rollercoaster, and your lashes are about to go on the most thrilling ride of their life. Gently place the curler at the base of your lashes, as close to the roots as possible, and give it a little squeeze. Hold on tight for a few seconds to let the curler work its magic!
Now, I know what you’re thinking – why should I bother with an eyelash curler? But let me tell you, this step is a game-changer! Just like a good pair of high heels, curling your lashes adds that extra oomph to your look. It opens up your eyes, making them appear bigger and more awake. Plus, it sets the stage for the mascara to work its wonders.
But here’s a little pro tip for you – don’t go all Hulk on your lashes. Gently squeeze the curler, giving it a delicate touch. We’re going for a subtle, natural-looking curl, not a dramatic twist worthy of a contortionist. Trust me, less is more in this case. So, take a deep breath, channel your inner zen, and curl away!
Hold the mascara wand at a slight angle and start at the base of the lashes.
Alright, ladies, let’s get down to business! When it comes to applying mascara, you want to make sure you’re holding that wand just right. You don’t want to go in straight or you’ll miss out on the full potential of your lashes. Angle that bad boy slightly and start at the base of your lashes, where the magic happens. This technique allows the mascara to coat each and every lash from root to tip, giving you that gorgeous length and volume you crave. It’s all about starting strong and building up that drama!
Gently Wiggle the Wand to Achieve Luscious Lashes
Okay, ladies, let me spill the tea on how to get those fierce lashes. Trust me, this tip is a game-changer! So, once you’ve got your mascara wand loaded up with that magic formula, here’s what you gotta do – hold that wand at a slight angle and start at the base of your lashes. Now, here comes the fun part – gently wiggle it from side to side as you move it up your lashes. Yep, you heard me right, wiggle it like you just don’t care! This little trick helps to separate your lashes, ensuring every single one gets coated in mascara. It’s like a party for your lashes, girl!
Apply a second coat of mascara for extra volume.
Okay, ladies, now here’s where the real magic happens! After you’ve coated your upper lashes with that first layer of mascara, it’s time to take it up a notch and give your lashes some serious oomph. How do you do that, you ask? Well, it’s as simple as applying a second coat of mascara!
This is the step where you can really amp up the volume and drama of your lashes. Just like painting a masterpiece, you’re going to build upon that first layer of mascara to create a truly eye-catching look. So, grab that mascara wand and get ready to turn those lashes into showstoppers!
When applying the second coat, don’t be afraid to really work the wand through your lashes. Wiggle it back and forth from the base to the tips, making sure to coat every single lash. This will help to separate and define each lash, giving you that full and voluminous effect.
Now, I have a little secret for you – I like to start the second coat by focusing on the middle portion of my lashes. This helps to create that coveted wide-eyed effect and adds an extra boost of volume right where you want it. Then, I go back and coat the base and tips of my lashes to ensure every lash is coated and looking fabulous.
Remember, ladies, a second coat of mascara is your ticket to lashes that are va-va-voom! So, don’t be shy – give those lashes the volume they deserve and watch as they steal the show!
For a More Natural Look, Ya Gotta Tidy Up Those Lashes!
Listen up, ladies! If you wanna rock a natural, effortless look, then this tip is gonna be your new BFF. Picture this: you’ve just applied your mascara perfectly, but uh-oh, there’s a tad too much on the tips of your lashes. No worries, though! Grab that trusty cotton swab and get ready to work some magic!
Now, here’s the dealio. Take that precious cotton swab and gently swipe it along the tips of your lashes. You don’t wanna press too hard, my friend, ’cause we don’t wanna mess up all the amazing work you just did. Just give those lashes a little cleanup, removing any excess mascara that’s chillin’ on the ends. Trust me, it’s gonna make a world of difference.
Why is this tip so important, you ask? Well, listen up, ’cause I’m about to drop some knowledge on ya. When you remove that excess mascara, it helps your lashes look more natural and fluttery. You don’t want ’em clumpy or weighed down, right? Plus, it gives ’em that oh-so-coveted separation, making ’em stand out in all the right ways.
So, next time you wanna rock those effortlessly gorgeous lashes, don’t forget to grab that cotton swab. It’s a small step that’ll make a big difference. Trust me, your lashes will thank you!
Applying Mascara FAQ
How do you apply mascara to your eyelids?
Alrighty, let me spill the beans on applying mascara to those upper eyelashes! First things first, make sure you’ve got a clean wand and a fresh tube of mascara. Grant your lashes that pre-mascara gift by curling them with a lash curler – you know, those scissor-like contraptions that give your lashes a lift. Now, it’s showtime! Grab that wand and gently wiggle it from the root to the tip of your lashes, coating them evenly. Make sure to get the tiny lashes on the inner and outer corners too, so they don’t feel left out. If you want to pump up the volume, layer on another coat by zig-zagging the wand through your lashes. But hot tip: don’t go overboard or you’ll end up with clumpy lashes that look like spider legs. Ain’t nobody got time for that! Once you’re happy with the mascara goodness on your upper lashes, let it dry for a hot minute before batting those beauties at the world.
But hold your horses, partner! Applying mascara to your eyelids? Now that’s a recipe for disaster, and trust me, I’ve seen some folks try it. Mascara is meant to be applied to your lashes, not on your lids. Sure, accidents happen, but if you find yourself with mascara smudges on your eyelids, fear not! Take a clean cotton swab and gently dab it on the smudged area. Don’t rub, though, or you might end up spreading it even more. If the smudges are stubborn, a touch of makeup remover or micellar water on the cotton swab should do the trick. Just make sure to be careful around your eye area, ’cause nobody wants irritated peepers. So remember, keep that mascara where it belongs – on your lashes, not your lids!
Why do you only put mascara on top of your eyelashes?
So, let me tell you, when it comes to applying mascara, there’s a trick to it. You gotta start by holding the wand parallel to your eyelid and gently wiggle it at the base of your upper lashes. Don’t be too heavy-handed, my friend, or you might end up with clumpy lashes. Then, as you slowly move the wand upwards, use a sweeping motion to evenly coat those babies from root to tip. Now, here’s the deal, you might think why just the upper lashes? Well, let me spill the beans. When you apply mascara only to the top lashes, it creates an illusion of lifted and fuller lashes, making your eyes pop. It’s like giving them a little extra oomph, you know? So, focus your attention on those upper lashes, and get ready to bat those beauties all day!
How do you layer mascara without clumping?
Well, let me tell ya, applying mascara to my upper eyelashes is a breeze! Here’s my little routine: First things first, I always make sure to curl my lashes with an eyelash curler. This helps to lift ’em up and make ’em look all flirty and fabulous. Then, I take my mascara wand and starting at the base of my lashes, I wiggle it back and forth as I slowly move it towards the tips. This gives ’em some volume and length. Now, to avoid any clumps, I apply mascara in thin layers, letting each coat dry before adding another. Oh, and I always make sure to wipe off any excess product from the wand on a tissue before I start. It helps prevent any clumpy disasters. So, there you have it, my secret to layering mascara without any clumps. Happy lashin’!