A lash lift is an alternative to eyelash extensions and curling irons. It works by permings your lashes into place so that they look longer and fuller without any damage or discomfort. With a lash lift, you’ll get the look of longer, thicker eyelashes with minimal effort. Plus, it’s a great way to give your eyes a natural look – no need for fake lashes!
There are tons of advantages to having a lash lift including: the ability to shower and swim without worrying about smudged mascara; reduced time spent on doing your makeup; and no more spending money on buying expensive mascaras. Best yet, it’s a semi-permanent solution so you don’t have to worry about redoing your makeup every morning.
Step-by-Step Guide on How to Get a Natural Look with Lash Lifts
No matter what your beauty routine is, it’s always great to add an extra touch of magic to it. And one of the best ways to do that? With lash lifts! Whether you’re looking for an effortless glamour statement for your everyday look or some extra lusciousness for special occasions, lash lifts will give you the gorgeous look you crave.
If you’ve never gotten a lash lift before, don’t worry — follow these simple steps and you’ll have that natural look in no time flat!
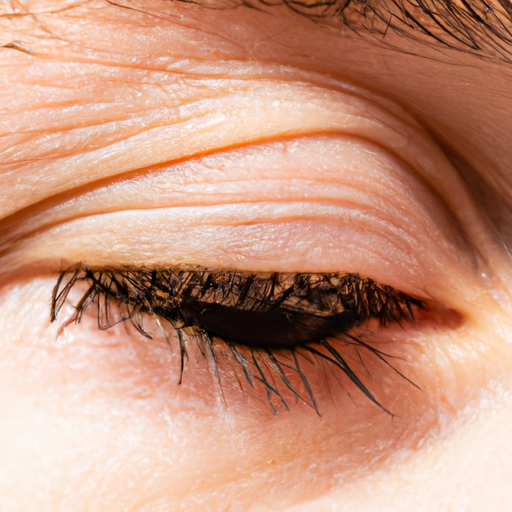
Preparing Your Lashes
The first step to getting a gorgeous lash lift is to make sure you prep your lashes properly. Gently remove any makeup residue, oil, and dirt from around your eyes and lashes.
Once your lashes are clean, the next step is to apply the lift cream. This should be done prior to attaching the lash rods. Carefully spread an even layer of the cream onto your lashes.
Attaching the Lash Rods
Now that you’ve got the lift cream applied, it’s time to attach the lash rods. These rods come in various sizes to fit different eye shapes and lengths, so take your time and choose the right size for you.
Applying the Perming Solution
Now that the lash rods are attached, apply the perming solution to your lashes. This can be tricky, but make sure you don’t get any on your skin or eyes — it won’t feel good if you do!
Neutralizing the Perm
Once the perming solution has been applied, let it sit for a few minutes, then neutralize the perm with a special solution. This will help set the curl and keep your lashes looking natural.
Applying the Setting Solution
After neutralizing, apply the setting solution. This helps to lock in the curl and achieve the perfect natural look. Again, be careful not to get any on your skin or eyes.
Removing the Lash Rods
Once the setting solution has been applied, you can finally remove the lash rods. Carefully remove each rod, paying attention to how long your lashes need to stay on each one. Too short or too long and you won’t get the natural look you’re after!
Tips for Achieving a Natural Look
So, you’ve decided to try out lash lifts and want to get that natural look? Well, I’m here to share my expertise on the matter with some killer tips!
To start with, be sure to choose the right size of your lash rod. If it’s too thick, it won’t fit properly and may look a bit wacky. Don’t go too small either, as it could cause damage and make your lash lift look fake.
Another hot tip is not leaving the solutions on for too long. Otherwise, it’s going to be a disaster! A few extra minutes can really mess up your work, so know when to stop. And remember, too little time is better than too much.
Finally, consider the color of the lash lift you’re getting. It might sound like a strange thing to think about, but trust me—it matters! Using colors that are too dramatic with your lashes can give you an unnatural look. So, pick colors that are close to your own so you don’t stand out like a sore thumb.
Conclusion
When it comes to getting the perfect lash lift, it’s all about methodically taking the right steps. Preparing the lashes before you start is key, and choosing the right size of rods can make a difference too. Once you’ve got your rod ready, you’ll want to apply the perming solution and then neutralize it, before setting it with the setting solution. And don’t forget to remove the rods at the end!
By following these simple steps, you’ll be well on your way to achieving that natural lash lift look. But there are also a couple of tips to bear in mind – like keeping an eye on the time the solutions are left on for and the color of the lifts. When done right, though, you’ll be able to benefit from the effortless beauty of your own long and luscious lashes.
So get ready to flutter those beautiful eyes with confidence; with this step-by-step guide and a few handy tips, you’ll soon be glancing through life with a gorgeous lash lift to boot!
Lash Lift FAQs
How can I make my eyelash lift look better?
As someone who’s in the know, I can tell you that the key to getting a natural look with lash lifts is all in the preparation. Start by thoroughly cleansing your lashes, taking special care to remove any excess makeup or oils. You can use a gentle makeup remover or even a cotton swab dipped in warm water. Next, apply a primer or lifting cream to the upper and lower lashes. This will help the perm solution stick to your lashes and give the lift greater staying power. And make sure to use a lash-lengthening mascara on the tips of the lashes, which will help create a subtle, natural look. Lastly, take it easy on the mascara and avoid piling on too many coats – you want your lifted lashes to look natural, not weighed down!
Why does my lash lift look weird?
As someone who has been getting lash lifts for years, I can tell you – it can be tricky to get a natural look with lash lifts. When done incorrectly, it can look downright strange.
Firstly, be sure to find a professional lash technician who knows what they are doing – and be sure to communicate your ideal look before your appointment. Explain what ‘natural’ looks like to you – whether that’s more subtle or more dramatic.
Then, when it comes to the positioning of the pad, make sure that it’s perfectly centered. A slightly misaligned pad can make your lashes look uneven – and that can be a real bummer.
Lastly, don’t forget to moisturize your lashes frequently, so they don’t become brittle. Even if you get the right lift, it won’t look natural if your lashes are dry and damaged.
Taking the time to perfect your lash lift will make all the difference in the world. Trust me – you won’t regret it!
How do you get a natural eyelash lift?
When it comes to achieving the perfect natural-looking lash lift, it’s all about the details. First thing’s first: do your research! Find out more about lash lifts, the products used, and what kind of results to expect. Then, make sure you find a lash technician that you trust. A qualified professional with lots of experience and great reviews can really help you get the best possible results.
Once you’ve got the right technician, it’s time to look at the details. Choose a natural-looking product, like a clear gel or a tinted lash lift dye. Ask about any special techniques the technicians might be able to do for a more natural look. Depending on the products you use, your technician might be able to customize the shape and length of your lashes to give you an even more natural look.
And lastly, make sure to communicate with your technician. Let them know if you want to go for a more natural look, and keep them updated throughout the lash lift process. With the right technician and the right products, you can get the perfect natural lash lift.