1. Introduction
Alrighty, let’s dive into the exciting world of mascara! So, what exactly is mascara, you may ask? Well, it’s that magic wand in a tube that us gals use to enhance our lashes, giving them length, volume, and that oh-so-glamorous look. Trust me, once you start using mascara, you won’t want to leave the house without it!
Now, let’s talk about why applying mascara to your upper eyelashes is a game-changer. First off, it instantly opens up your eyes, making them appear bigger and more mesmerizing. Plus, it adds that extra oomph to your overall makeup look, making you feel like a confident and fierce queen. Who doesn’t want that, right?
Essential Tools for Applying Mascara to Upper Eyelashes
Alrighty, lovely ladies, let’s talk about the tools we need to achieve those stunning, luscious lashes! Trust me, without the right equipment, your mascara game might fall flat. So, here are a few must-haves:
Curler: These bad boys are like magic wands for our lashes! They give them that extra lift and oomph, making our eyes pop.
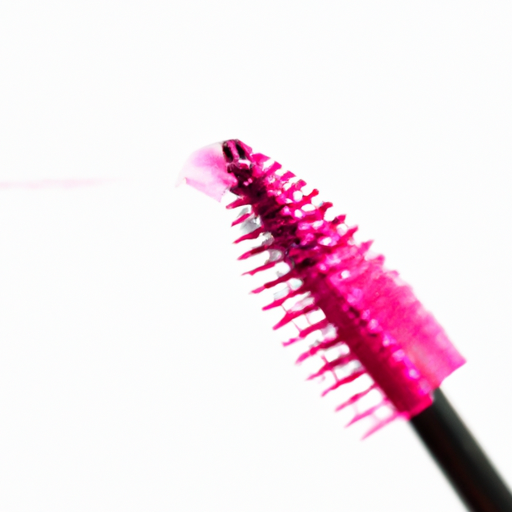
Mascara wand: The brush that comes with the mascara is essential for getting even coverage and separating those hairs. No clumps allowed!
Non-irritating mascara: We want our lashes to be fabulous, but not at the cost of irritating our delicate eyes. So, make sure you pick up a mascara that is gentle on your peepers.
Cotton swabs: Perfect for any mascara mishaps or smudges. Simply dip one in some makeup remover or water, and clean up that mess in a jiffy!
Mascara primer: For all you overachievers out there, this step is for you. Applying a primer before mascara can give you that extra boost in volume and length. Hello, beautiful!
There you have it, ladies! With these essential tools in your makeup arsenal, you’ll be able to rock those stunning upper lashes like a pro. Now, let’s move on to the step-by-step process of applying mascara. Get ready to transform your lashes from drab to fab!
Steps for Applying Mascara to Upper Eyelashes
Alright, ladies, get ready to make those lashes pop! Here’s my foolproof guide for applying mascara to your upper eyelashes like a pro. Trust me, these steps will have your lashes looking fabulous in no time!
Step 1: Grab your trusty eyelash curler and give those upper lashes a good squeeze. This will instantly lift and open up your eyes, making your lashes appear longer and more voluminous. Gotta love a little lash magic!
Step 2: Now, let’s give your lashes some extra TLC with a swipe of mascara primer. This step is crucial for conditioning and nourishing your lashes, ensuring they stay healthy and strong. Plus, it will help your mascara adhere better and last even longer.
Step 3: It’s time to dip our wand into that mascara tube like we mean it! Make sure to coat the wand evenly, ensuring there are no clumps or excess product.
Step 4: Here comes the fun part! Start at the base of your lashes and wiggle the wand back and forth as you work your way up to the tips. This technique will give you a luscious, fluttery look that’s sure to turn heads.
Step 5: Okay, patience is key here. Give that first layer of mascara a chance to dry before moving on to the next step. This will prevent smudging and clumping, keeping your lashes looking flawless.
Step 6: Ready for some extra va-va-voom? Time to apply a second coat of mascara. This will take your lashes to new heights and ensure maximum impact. Don’t be shy, go ahead and coat those babies again!
Step 7: Let’s double-check for any clumps or excess mascara. Take a clean cotton swab and gently swipe away any unwanted bits. We want our lashes to look defined and separated, not clumpy. Perfect!
And there you have it, my beauties! Follow these steps, embrace your inner lash queen, and get ready to flaunt those fabulous upper eyelashes. Trust me, the results will speak for themselves. Now go slay the mascara game!
4. Conclusion
Alright folks, we’ve reached the end of this mascara application journey! It’s time to wrap things up and recap all the essential tools and steps we’ve covered. Trust me, using these tips will have your upper eyelashes looking on point in no time.
First off, let’s talk about the importance of having the right tools in your makeup arsenal. You definitely want to have a good eyelash curler to give your lashes that extra oomph. And of course, don’t forget the mascara wand itself. Look for one that suits your preferences, whether it’s a thick or thin wand. Oh, and be sure to use a mascara formula that won’t irritate your eyes. Safety first, right?
Now, onto the nitty-gritty of applying mascara to those upper lashes. It all starts with curling those bad boys. Give ’em a little squeeze with the curler to really open up your eyes. Then, grab your trusty mascara primer and apply it to your lashes. This will help your mascara last longer and give you that voluminous look.
Next, it’s time to dive into the mascara itself. Dip that wand into the tube and start wigglin’ it from the base of your lashes all the way to the tips. Don’t be shy with the coats, but make sure you let each layer dry before applying the next one. And be wary of clumps, nobody wants spider lashes. If you do end up with some excess mascara, just grab a cotton swab and gently remove it.
So there you have it, my friends. Arming yourself with the right tools and following these steps will guarantee you killer upper eyelashes. If you want to dive deeper into the world of mascara application, be sure to check out this amazing resource I found at EyelashesHolic.de. Trust me, it’s chock full of expert advice to take your lash game to the next level. Keep on slayin’ those lashes!